Now we can access our server from anywhere we need to know how to access it. Both via SSH to access Ubuntu's terminal and via FTP to upload files. If you already have a favourite FTP and SSH client you can skip this page. You can use any SSH and FTP client you like, we all have our favourites. This isn't intended as a full FTP/SSH client review but it will get you started with a decent client for both. Those of you who are observant will notice I've been using a VPC to take the images despite stating I'm using a hardware server. It was easier than taking them on my camera and cropping them. From now on you will be sing my hardware server, not that it matters.
Lets start with FTP as I imagine more users will have used this. I actually use 3 different clients, 2 regularly and 1 which is just there as a backup, more on this later. Its the main 2 I'm concerned with first. The client I use most of all is FireFTP. I use it because I like the interface and the account manager FireFTP is an addon for Firefox so obviously your going to need Firefox to use it. FireFTP is also the client I'm going to guide you through. However I also recommend you try FileZilla. I both love and hate Filezilla. Not for any major reason, it's more my personal opinion that its interface sucks. Performance wise however it blows away any free/open source client I've used. If I need to FTP a large number of small files I use Filezilla. If I'm just editing files directly or down/uploading a few files I use FireFTP. The third client I use is AndFTP. AndFTP is an FTP client for Android phones and tablets. I have it installed on my HTC Desire Z. Before anyone asks, yes I have used it. I won't go into details but while out and about I discovered a bug on a website I was managing. It was quicker to edit it on my phone than head back to the office.
Before you get started your going to need Firefox. If you don't already have it get it. Even if you intend to use different FTP and SSH clients you are now a web developer and you need multiple browsers. I have the big 3 on my desktop and also check my sites with the default browser on my Android phone and with Opera mobile. By the big 3 I mean Mozilla Firefox, Google Chrome and Microsoft Internet Explorer. If your serious about developing you may also want to install older versions of browsers but for your first home/hobby site testing in the big 3 is more than enough. You will at least need 2 browsers when you start configuring your site. We'll go over this later.
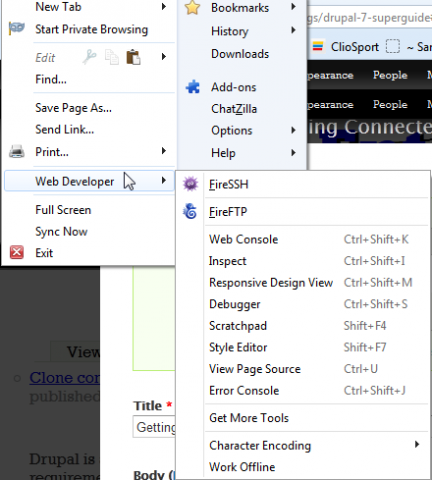
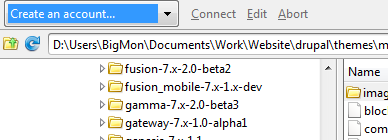
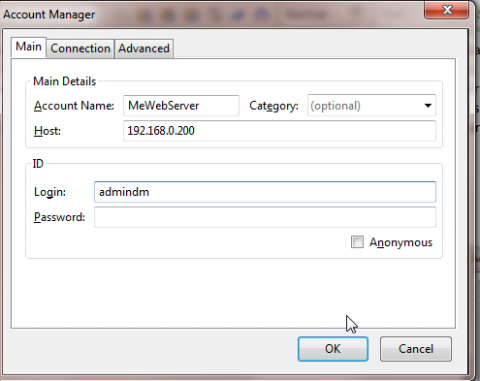
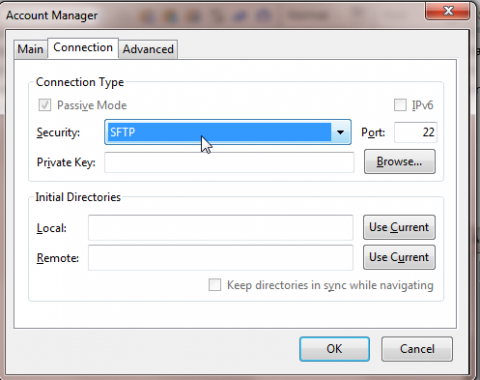
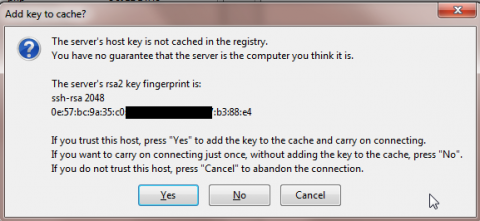
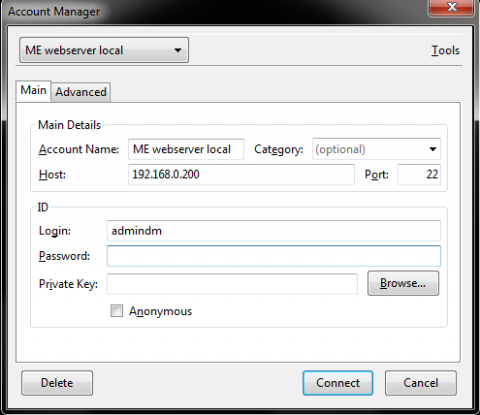
Installing FireFTP in Firefox is just like installing any other addon. From the Firefox Menu select Addons. In the search box in the top right corner type "FireFTP". It should be the first result, find it in the list and click install. This should add FireFTP near the top of the Web Developer part of the Firefox menu. Select it from the menu to open it. It will open in a Firefox tab. Before you can begin you will need to create an account. An account stores the connection settings used to access the server, including the IP address and connection protocol used. Click on create account and the account manager will open asking you to specify account details. The account name can be anything you like. Its simply to identify the account in the account list. Category is optional. If you set a category you will get an additional pull down box next to the one to select your account. If you only manage a small number of servers a category is pointless. The host is the address of your server. This can be the local IP address if its on your local network, it can also be your internet IP address or any web address on your server, assuming you have forwarded the FTP and SFTP ports. The login and password are the ones you use to log into the server. You can leave either of these blank and you will be asked whenever attempting to connect. I typically fill in the user name and leave the password blank. You will also need to visit the connection tab. We'll be coming back here shortly but for now all you need to change is the security type. SFTP is what your after here. If you have followed the guide so far it will have been setup when installing the server and its the most secure option available. Once you click OK you'll notice the pull down box in the corner has auto-selected the account you just defined. Click Connect. You'll be asked for a username and password if you haven't saved one already, use the one you set up when installing the server. If this is the first time your connecting to this server when you connect you will be asked to confirm the servers RSA key. This is a unique identifier for your server so if it changes then its possible your accessing the wrong server.
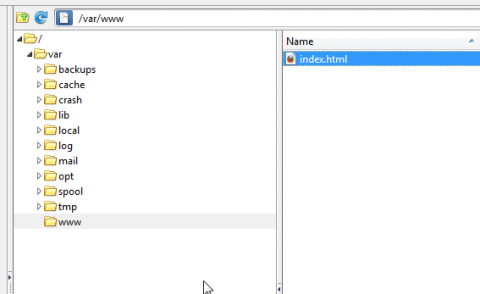
Now your connected I'd recommend you save your commonly used directories. The left pane is your PC and the right pane is your server. In the left pane browse to wherever you store your website files, If you don't have any yet you can do this later. In my case this folder is Documents\Work\Website. The right hand pane should now be displaying your home directory. This isn't where your website is stored in our configuration so you will probably never use your home directory. Browse to /var/www. This is where Apache has put its landing page and later we will be putting Drupal here. Now we are going to save these two directories for later use. That way whenever we connect we will be looking at the correct directory. Click the edit button in the top left corner. On the connection tab there is a box for initial directories. Click "Use current on both the local and remote.
When it comes to SSH I've recently started using FireSSH. This is by the same developer as FireFTP. I mainly use it because I like the account manager and the interface. It can be added to Firefox through the addon manager the same way FireFTP can. I have previously used putty but I prefer FireSSH. As you may have guessed I also have an SSH client on my Android phone. I recommend you take a look at ConnectBot from the play store. As soon as you open FireSSH you are greeted by the account manager. The fields are the same as FireFTP except there is no connection tab. As with Fire FTP you can optionally leave username and password blank and it will ask when connecting. Once connected you will notice it looks identical to the interface you get when logging in to your server using its own keyboard and mouse. Congratulations you can now relegate your server to the back of the cupboard and put its monitor to better use. Personally I use it as a second monitor for my desktop workstation.
One last little note. If your going to enable the Ubuntu firewall, which I recommend you do, then it would be a good idea to do this now before putting away the keyboard as setting this up will kick out any SSH sessions. I've grouped the firewall in with server configuration later in the guide. If your not leaving the keyboard connected then skip ahead to it here
